Our Laundry Room Makeover Plans
A few weeks ago in IG stories, as I was wrapping up the guest bathroom makeover, I had my followers vote on which room in my house I should tackle next. Of the 4 choices—kitchen, living room, master bathroom, and laundry room. For a while, the master bathroom and laundry were neck and neck in the polls until right at the end, the laundry room won out by 18 votes! Obviously, they’ll all get done at some point, but it was so fun getting to see which rooms my followers would prioritize over others. Btw, if you’re not following me on IG yet, you should be!
It’s worth noting, that neither the guest bathroom nor the laundry room was on my goal list for rooms to tackle in 2021. Off to a pretty terrible (but beautiful) start there, K. Oops, typical me. It’s just that I always have SO many ideas running through my mind, but sometimes I get hung up on one and can’t let it go. It’s honestly one of the very fun perks of having a whole house to work, very few responsibilities, and (almost) unlimited design freedom. I can do what I want when I want! And right now, I want to makeover our laundry room :)
planning out my laundry room makeover
Once it was decided that I’d be working on the laundry room next, I started planning out exactly how I wanted it to look. I already had some initial ideas saved to a Pinterest board I created when our home was still under construction, but after living in the house for a few months, I had a better idea of what I wanted/needed out of the space.

Of course, being the terrible blogger that I am, I once again forgot to take before pictures. Sighhh. But here’s a screenshot from stories to show you what the space originally looked like.
elements that worked/I liked
…I really can’t think of any haha. That’s not to say that anything needed to change…but it also didn’t like the room the way it was. So plain, so boring.
elements that needed to change
The shelving. Shame on builders for mounting a single shelf in a room with 9ft ceilings and calling it “storage”. Tsk tsk. Not only was there a ton of wasted space above it, but the shelf was also mounted too high for me to reach!
The white, white walls. I love white walls, obviously. I painted my entire house in SW Extra White. But, certain spaces just need a little color.
The door. Urghhhh the door. The way our laundry room is set up, the door swings inward completely blocking the dryer while open. So if you’re doing laundry, you have to close the door behind you in order to access the dryer. For most people, this would be a pretty minor thing, but we don’t settle for “just okay” around here. At least, I don’t. Ira could care less about the door, but he’s also not the one doing the laundry so his opinion doesn’t exactly count all that much…
determining the layout
I originally thought that I wanted a stacked washer/dryer setup because of how small the room is. Our builder had other plans though…literally. The dryer vent was planned out for the right side of the back wall and there was no option to change its location or add a second vent to accommodating stacking the dryer above the washer. Once I came to my senses and remembered that I’m only 5’2”, I gave up on the idea of stacking them all together. The dryer controls would be too hard for me to reach and I didn’t want to pull out a step stool every time I needed to retrieve a lone sock from the dryer drum.
Moving on from the stacked idea, I started looking at possible options for cabinets and/or shelves above our side-by-side washer and dryer. I did like the idea of upper cabinets, but we don’t actually have all that much that we need to store up there. PlusI felt like the visual weight of the cabinets would make the already small room feel tight.
The cabinet and shelf combo is pretty popular on Pinterest but I couldn’t find a setup that fit our space nicely. I personally don’t like the look of small shelves sandwiched between big cabinets in such a small room.
With all of that in mind, it made the most sense to just do simple floating shelves up above the washer and dryer. With 9 foot ceilings, I knew I could spilt the difference between where the current shelf was mounted and comfortably fit 2 shelves on that wall. This will add more storage opportunity for things we don’t need to access all the time, like extra batteries and lightbulbs, up on the top shelf. Then the bottom shelf could be mounted at a height I can actually reach and would be used for laundry items.
choosing the design elements
the accent wall
Once I decided on the overall layout of the room, it was time to move onto the most fun part—the design elements! It wouldn’t be enough for me to just throw some new shelves up on the wall and call it a day. Y’all know I’m too extra for that. So I started by choosing what I wanted the focal point of the room to be and it made the most sense for that to be the wall with the shelves. I toyed with the idea of paint or wallpaper, but after decorating what feels like a million different apartments I wanted to use this opportunity to do something more permanent.
I fell in love with this concrete look hexagon tile a few months back and have been trying to figure out a good place to use it. All of our floors are brand new, so I knew if I wanted to use this tile, it would have to be on the wall. In a strange twist of events, the same day we (me + my IG followers) decided the laundry room would be next, Marazzi discontinued that same tile I had been eyeing. I knew I wouldn’t be able to find anything similar at the same price point, so I quickly snagged up enough boxes to cover the wall, plus some extra just in case, and that was that. I had decided on my accent wall.
the other walls
For the other 3ish walls (2 of them have doors so they’re not full walls), I really struggled on what I wanted to do. Should I paint them? Yes, but what else? As I said, I wanted this room to have character and pizazz and really be an opportunity to do something other than just painting. I was torn between vertical paneling/b&b and shiplap, when the coolest idea came to me in a dream (in case you didn’t know, like 70% of my design ideas come to me in my sleep. I swear my brain never actually turns off). I’m still working out the exact plan, but I just know it’s going to be epic. I’m thinking geometric slat wall…take that as you will.
the door
The solution for this one was pretty simple, to me. What do you do when the swing of a door gets in the way? Turn it into a sliding door, duh! Blame it on my apparent incessant need to rip apart my brand new house, or the light switches that were placed just 2” too close, whichever, but unfortunately, a barn door wasn’t going to work in this space. On top of that, again, I just really wanted something more permanent. Something that added to the craftsmanship and character of our home, rather than looking like an add-on piece. Don’t get me wrong, I love barn doors, but there’s a wall and a place for everything. And this one wasn’t it.
Ya know what’s better than a barn door though? A pocket door! I mean what’s not to like about a door that disappears completely into the wall?! You get the best of both worlds—a nice open space without dealing with the footprint of a door swing, AND the privacy and sound dampening of a true door. It checked all my boxes so we went for it…
Until I cut open the drywall to find out that the wall I intended to install the pocket door on was actually loadbearing and this would not be a simple DIY project. We’re getting a contractor to come in a help us out with the installation, so that part of the project is on hold for now, but you can catch up on the pocket door saga in my IG stories!
The washer & dryer
We currently rent our top-loading washer & dryer and have been since we lived in our last apartment. It’s pretty affordable (only $40/month total) so we haven’t been in a rush to buy our own. However, I do know that I eventually want to get front-loading machines. I know, I know—some people have some BIG opinions about top load vs front load. I received many, many DMs from people cautioning me against front loaders. Growing up, we had a front loader for as far back as I can remember and didn’t have any major issues. We always wiped down the inner rubber seal of the washer after using it so that mildew wouldn’t grow left the door cracked so it could air out between washes. No biggie. To me, have a top-loading washer is a waste of space in my laundry room because it leaves no room for folding space…but we’ll come back to that.
I searched high and low for front-loading washer & dryers with good reviews, came in a color I liked, that were in stock & available immediately…no luck. Appliances are really back-ordered right now, so this part of the project will have to wait until more options become available, or until I find one on a good sale that I just can’t pass up.
tabletop & hanging space
Those who know me know I’m TERRIBLE at keeping up with the laundry. No seriously, I only wash clothes like once a month, and then it takes me another two weeks to fold and put them away. Normally the clean clothes sit in piles on the couch, begging me to return them to where they belong. We play this game where the fresh clothes get dumped on the bed, but then moved to the couch when it’s time to go to sleep, and then back on the bed the next day, meaning “fold these TONIGHT, damnit”, but then get moved back to the couch…you get the picture.
So I’m implementing a new rule, effective immediatelyish : the only clothes that leave the laundry room will be on hangers or already folded. And that’s on tide pods. Period. I’m still brainstorming what I’ll do for hanging space, but I know I want it to be minimal and unobtrusive. The tabletop I’ll build out myself so that it matches the floating shelves, but is the same depth as the washer & dryer. With a dedicated hanging rack and folding space on top of the washer and dryer, I really have no reason not to go ahead and fold/hang the laundry and put it away. Obviously, I won’t be able to build the tabletop until we replace our washer and dryer, but I’m excited to see if it actually helps me solve my never-ending laundry problem.
builds, diys, & decorating
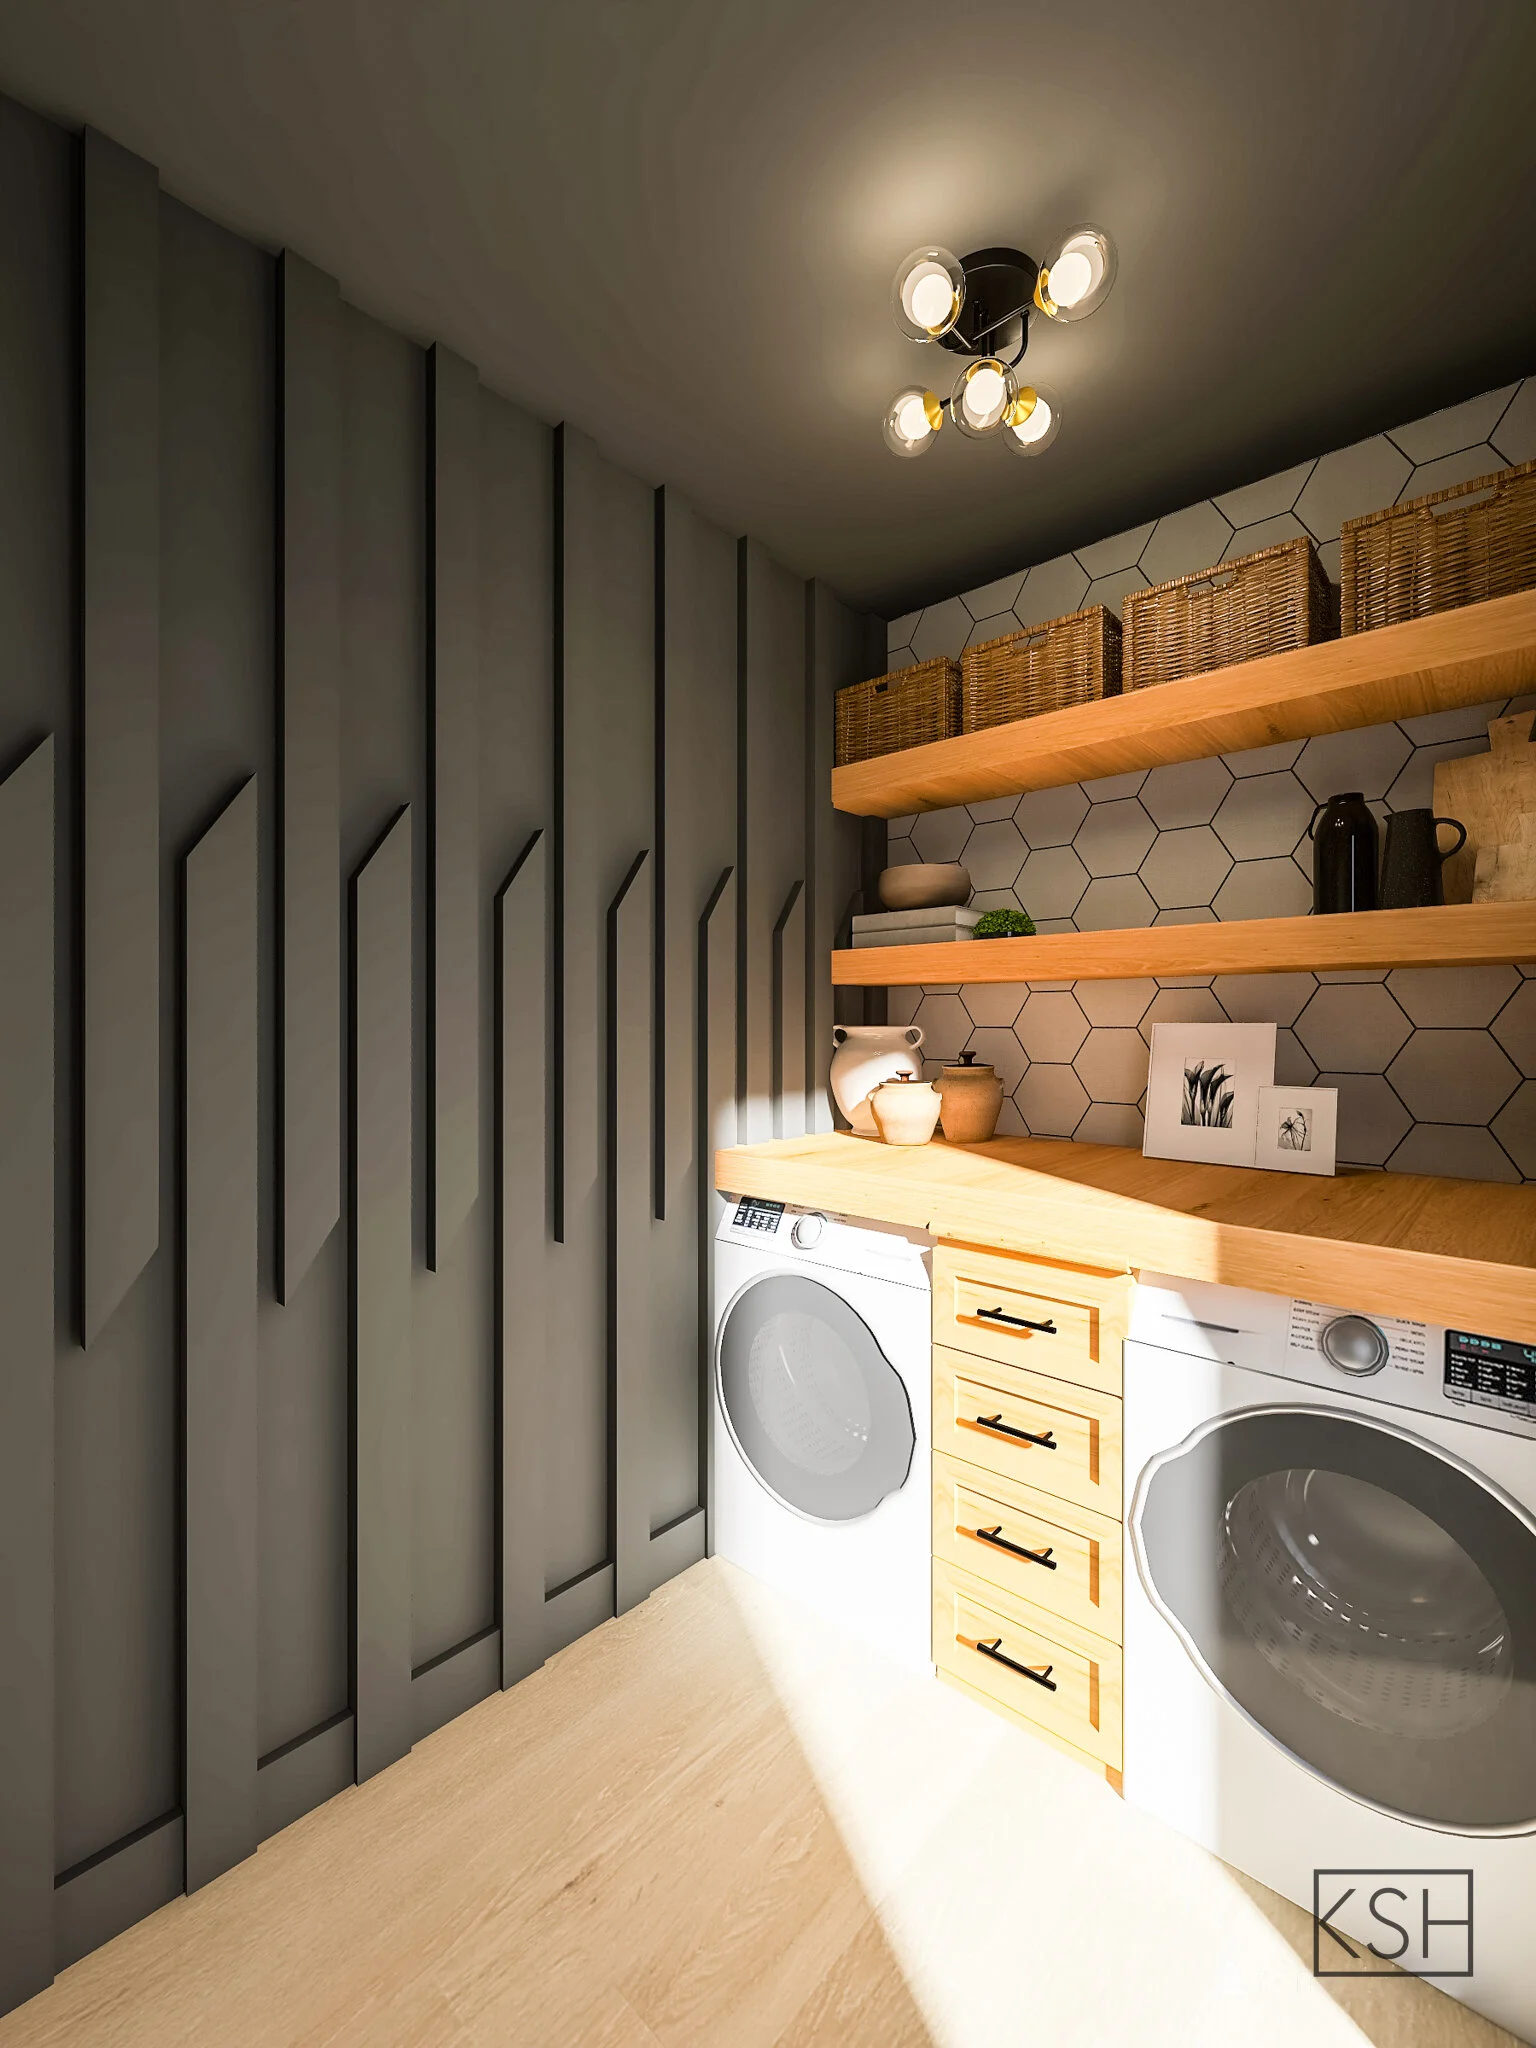
When all is said and done, I’m hoping this room will look something very close to ^ that. So, I clearly have my work cut out for me! Building floating shelving, tiling a wall, adding shiplap (or something?), painting, replacing the washer & dryer, building a tabletop, creating a space for hanging clothes to dry, and installing a pocket door. WHEW! I’ll try to keep the blog updated as I work through each of these projects for this room makeover, but as always, the best way to keep up is to follow me on Instagram! That’s where you’ll find all of the behind-the-scenes, walkthroughs, video tutorials, builds, DIYs, and decorating! I’ve got a lot to do so I’m gonna go get back to it. Ya know where to find me!