DIYing The Walk-In Closet of My Dreams with the IKEA Pax System
A gorgeous walk-in closet with tons of organized storage and color-coded everything has been on my wish list for a while now. And when I say “a while”, I mean like 10+ years. I’ve always had a lot of clothes and shoes. I can’t even count the number of times the weight of my hanging clothes has pulled my closet rods clean off the wall. Eventually, my parents got smart and started mounting the rods to additional support studs because there were just SO MANY CLOTHES.
After sharing my closet on IG, I received a ton of “do you actually wear all of those?!” messages. And yes, yes I do! I regularly clean out my closet and get rid of things that no longer fit me or my style, so that it’s not taking space. But even with frequent closet cleanouts, I still have a few old favorites, like pair of jeans that I’ve been rocking since the 9th grade and my first pair of UGGs from middle school (still in amazing condition)! Add in an inability to turn down a good sale and weakness for all things loungewear, and there you have it...my closet. Stuffed to the brim, always. Not to mention this same closet holds all of Ira’s clothes too. And make no mistake, he has just as many clothes as I do, and probably even more shoes.
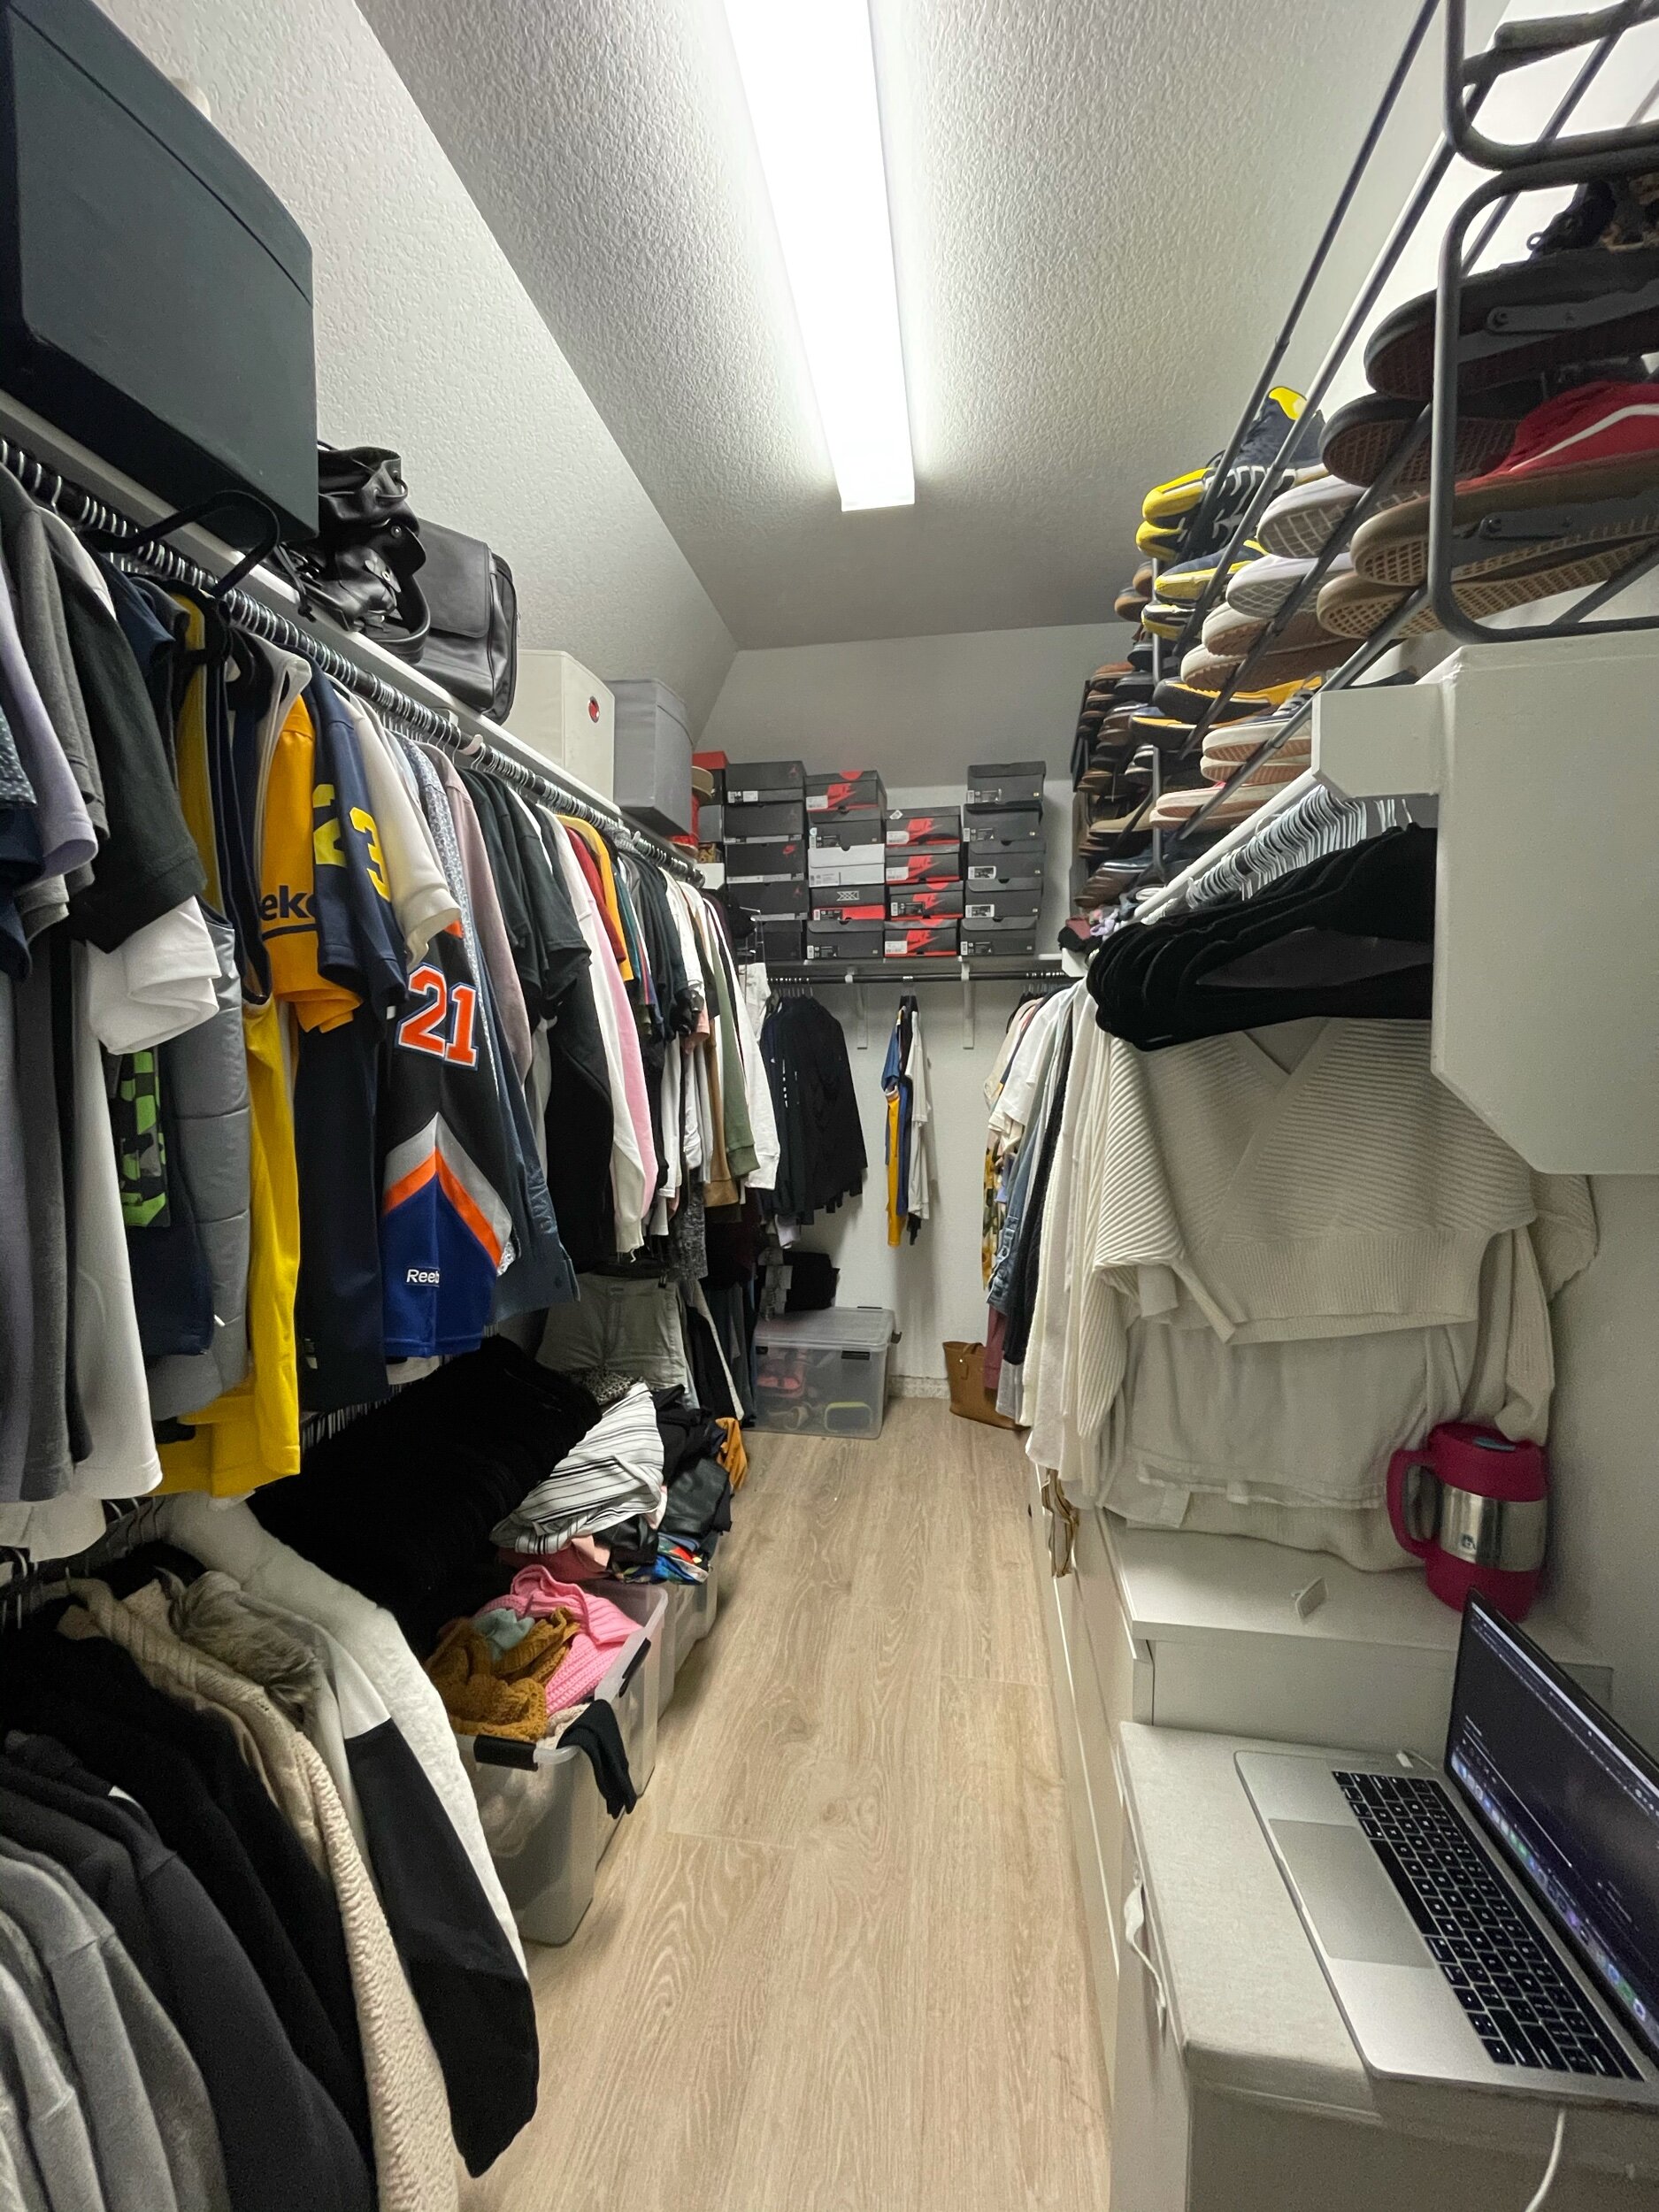
I snapped this picture right after my latest closet cleanout which resulted in me purging 3 full bins of clothes…and yet, the closet is still, for all intents and purposes, full 😅 So yeah. Change was needed. Desperately.
ps. This blog post is just meant to be a general overview of creating our IKEA Pax closet. In an effort to keep this post from being even longer than it already is, I’ll just touch a little bit on the topics below & expand on each of them in their own separate blog posts. Deal? Deal.
The IKEA Pax System
I knew before even embarking on this project that I wanted to use the IKEA Pax System to create my dream closet. IKEA is amazing when it comes to providing quality products that are easy to assemble, easy to install, and easy to customize. Yes, easy! It’s a lot of work yes, but not hard work. Especially when compared to building a closet completely from scratch.
By starting with the IKEA Pax Wardrobes as the basis for building our closet, I was able to focus more on the overall design and organization elements, since the hard part was already done for me. The Pax System has 6 different sized wardrobes, all with corresponding shelves, drawers, and accessories so that you don’t have to worry about creating anything yourself if you don’t want to. An in-depth blog post on all of the elements and pieces of the IKEA Pax System is in the works, so check back next week for that! There are seriously SO many ways to configure all of the pieces! Prefer to hang your clothes instead of folding them? Drawers instead of shelves? You can do all of that and more with the Pax System. (ps. This isn’t sponsored...although, IKEA, hit ya girl up! I’d LOVE an opportunity to partner with you! But seriously, this isn’t sponsored. I just can’t rave enough about how easy and affordable it is to create a custom closet using IKEA’s Pax System).
Comparing Cost - IKEA vs Custom vs Built From Scratch
Speaking of affordable...I know what you’re thinking because I’ve already received a million messages about it. “So how much does an IKEA closet cost?”
I plan on writing a separate blog post after the closet is complete with the total cost of everything, links to shop, and all that jazz. But since I’ve already gotten quite a few questions about how the price of the IKEA Pax System compares to getting a custom closet designed and installed by a company like California Closets or The Container Store, I wanted to touch a little bit on that.
To be completely honest, I never got my own quote on a custom closet because I already knew I wanted to DIY this. Every blog post I’ve read, and just about every project I’ve done, has taught me that the cost to DIY is almost always much less than what you'll pay to have someone do it for you. It just makes sense. When you DIY you only have to pay for materials. When you hire a job out, you’re paying for materials and labor. I always say you can spend time or you can spend money, but you’ve got to spend one of the two. Everything has a price. So for me, because I enjoy DIY just as much as I enjoy saving money, it was worth it to spend the time.
Another question I’ve gotten a few times is whether or not it’s worth it to start by using the Pax System as a base, or if it would be cheaper to build the entire thing from scratch. I’ll go more into detail on the pros and cons of an IKEA closet in my next blog post, but the biggest benefit to me is already having everything you need pre-made to the correct dimensions. You don’t have to worry about building your own drawers or making sure your measurements are 100% precise the way you do when you’re building something from scratch. Everything you need for the Pax System is pre-made so you just buy what you need and assemble it. Plus, with the cost of wood just skyrocketing these days, I wouldn’t be surprised if building from scratch actually ended up being more expensive than the Pax System.
So, in short… IKEA Pax System: Spend Time, Save Money | Custom Closet Company: Save Time, Spend Money | Building From Scratch: Spend Time, Spend Money
Planning Our Closet
The planning phase of our closet makeover has actually been an ongoing, never-ending, task that has continued past the brainstorming stage and seeped through the entire process of installing the new closet. I, of course, started by going to Pinterest for inspiration and direction. Not only was I able to save all of my design inspo in one place, but also all of the tips & helpful blog posts I came across about building the closet itself. Once I had a look in mind, I started on the actual space planning. I’ll explain in more detail what I did WRONG when planning this closet in a later post so that you don’t make the same mistakes I did, but for now, here’s how you should be planning out your new closet.
Start by purging your closet. Get rid of anything you don’t wear, don’t like, or that’s just unnecessarily taking up space. This will help you get a better visual inventory of what you’re working with.
Measure your clothes so that you know how much space they take up. You don’t want to plan out a closet full of drawers only to find out you actually needed more hanging space.
For our closet though, we had a lot of clothes that were previously hanging that we knew would need to be folded down. So we actually skipped the measuring and just did the best we could with eyeballing it for the planning stage. Once the Pax units were installed though, I took the time to load alllllll of our clothes back into the closet--before painting, before trimming it out, basically while still assembling everything--so I could be sure everything would fit. This isn’t a necessary step, and in fact, I’ve never seen anyone else do it this way, but I knew with just the sheer amount of clothes we have, I couldn’t leave anything up to chance. I had to make sure everything would fit first, not at the very end!
Use IKEA’s online Pax Planning Tool. It’s super straightforward and easy to use, and honestly so great, it deserves its own post, so check back for that!
The Pax Planning Tool is truly the MVP of the entire Pax System. It makes it really easy to visualize exactly how the Pax System is going to look in your space and determine what all you need to buy. You can input the dimensions of your closet into their planning tool and then load up your virtual closet with wardrobes and the additional pieces like shelves, drawers, pull-out trays, etc. As you add and remove pieces, you can see the total cost fluctuating in real-time so you always know how much it’s going to cost when comparing different layouts and options. Once you’d designed the entire closet, it’s a very simple one-click step to add everything to your shopping cart and order your new closet. Whether you opt for delivery (which is only $49 and totally worth it!) or click-and-collect, either option beats wandering up and down the aisles searching every bin for the pieces you need, loading it all up, pushing the heavy ass cart through the store…you’ve been to IKEA before. You know what I’m talking about.
Customizing Your IKEA Pax Closet
Remember when I said IKEA was easy to customize? That bit was a very important determining factor for me. When I first started planning this closet makeover I didn’t have a clear vision in mind of what I wanted our closet to look like, I just knew I didn’t want it to be plain. Everyone has a plain white closet with some hanging rods, maybe a shelf or two, but I wanted luxury! Drama! High-end fitting room vibes!
All of my tips for customizing the Pax System will be coming soon in its own blog post, but some of the most common ways to make the Pax wardrobes look less IKEA are trimming out the front of the wardrobes to hide the seams between the units, adding custom flush drawer fronts, attaching baseboards, and painting them a different color.
After using the IKEA Pax Planning Tool to plan the exact layout of our closet, I was able to start designing how I would add to the closet to put my own spin on it and give it a little more of a custom look. Of course, I turned to my favorite rendering tool, Homestyler, and mocked up what the finished closet would look like.

Now that, my friends, is a damn good looking closet.